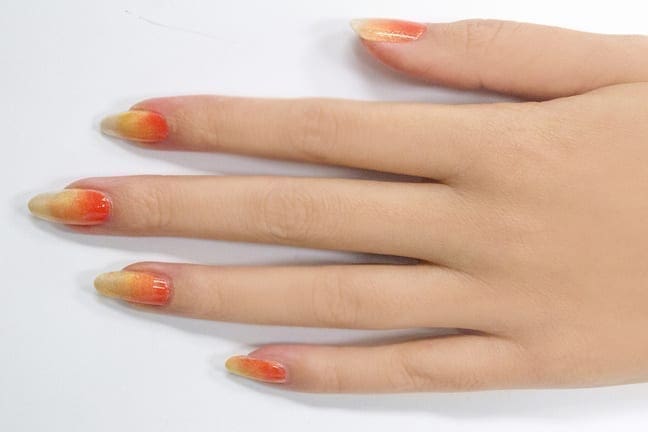
We’re embracing vacation vibes with this week’s exclusive nail art tutorial from Caption Polish. Say goodbye to winter with a DIY sunset on your nails with this easy – we promise! – ombre art.
Ombre only looks complicated. All you need are complimentary shades, unless you prefer to go bold and choose colors that clash. For our Caribbean-inspired mani, we’re working with Caption Polish in Sorry, I’m Not Sorry ($12), a coral red orange; Get Happy Fast ($12), a bright neon yellow that’ll have you dreaming of the sunshine; and Come to Mama ($12), a Caption Top Effect in blue silver shimmer. Don’t forget your top and base coats!
 |
- Cleanse the nails of any dust or oil and add one layer of a clear base coat.
- Polish a single, thin coat of shimmery polish (blue-silver top effct) on both hands.
- Place your two ombre colors (orange and yellow) side by side on a tile.
- Starting with the darkest color, use a makeup sponge to pat polish onto the half of the nail closes to the cuticles.
- Do the same with your lighter color on the top half of the nail to complete the ombre. Dab the lighter color so that it overlaps with part of the darker color, creating a gradual change from dark, to medium, to light.
- Finish it off with top coat.
READ MORE: Easy DIY Shimmery Metallic Nail Art


