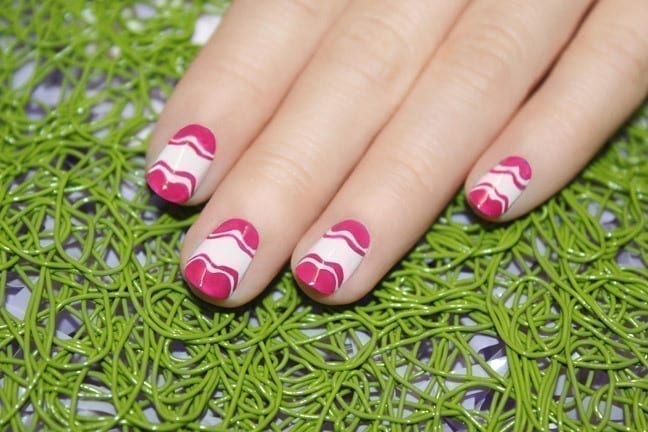
All you have to do is look on Pinterest to see there’s plenty of pretty, spring nail art out there. But it’s not every day we come across an Easter nail tutorial that’s both easy to do and acceptable to wear for longer than just one day. I mean, who really wants to still have an Easter bunny on their nails on April 9th? Enter nail artist Jin Soon Choi: Her pretty scalloped design is also vague enough to just be a downright cute April mani, holiday theme aside. All you need to complete it is white polish, one color, and a thin nail brush to draw on the finer lines in the design.
Here are her easy steps for the nail tutorial below!
 |
Step 1: Apply a base coat like JINsoon Power Coat to prep the nails
 |
Step 2: Apply 2 coats of a white nail polish, such as JINsoon Doux, to each nail
 |
Step 3: Using your choice of a colored polish (JINsoon Farouche is pictured here) paint a rounded “m” shape at the tip of the nail and fill it in to the edge.
 |
Step 4: Repeat the “m” shape at the cuticles, filling in the same way you did the tips.
 |
Step 5: Using a thin brush, draw a fine line mimicking the “m” shapes you created with Steps 3 and 4
Step 6: Apply a top coat, such as JINsoon Top Gloss, to complete the look. Then try to let it fully dry first before you dig into those Cadbury Mini Eggs!


